I like to think of myself as a Volkswagen lover. Because of this, I envy every vehicle Germany has to offer. You can imagine how pleased I was when this Audi showed up at the shop.
Here it is upon arrival. From this view, the car looks to be in good condition.
Now lets take a closer look... The white paint was filthy and covered in tar.
You'll notice while driving that Audi front wheels are usually extremely dirty. This is actually brake dust from Audi's stock brake pads. In this case, brake dust was destroying the beauty of these aftermarket wheels.
The 3M tape on the front end was a major concern for the owner. As you can see, it was covered in bug guts.
The wheels and wheel wells were cleaned. The car was then washed and dried. It was out of the wash bay and on to the detailing bay. The interior was up next.
Here is the driver's side door. It had black scuff marks all over it. It didn't match the tan interior very well!
The owner complained of a fowl smell coming from unknown whereabouts. I believe I found the culprit in here. The owner thought it was a mouth wash spill.
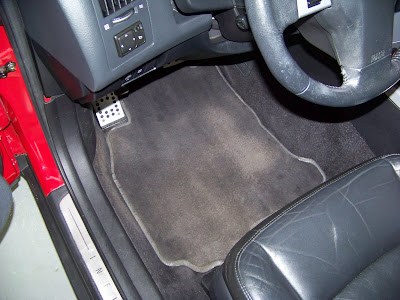
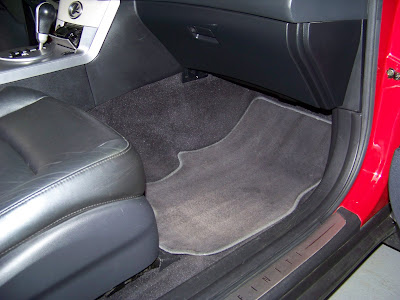
For the first time ever, I witnessed a passenger's side floor mat to be in worse condition than the driver's side. Since Audi floor mats are very plush, it would be easy for the shampoo to extract the stains.
~~~AFTER SHOTS~~~
The exterior was sealed and waxed. The tires were dressed.
Let there be chrome! Notice all the tar has been removed from the lower part of the car.
I went an extra step and used a claybar on the front end to ensure every little contaminant was removed from the 3M tape.
Lets use this mirror reflection to determine the weather. I'd say partly cloudy.
So long scuff marks.
The stains in the middle console were completely removed.
The rest of the interior was cleaned and dressed. Sorry how my big feet made the floor look dirty!
This is the passenger's side. Notice all the stains on the carpet have been removed.
Thanks for looking!
Wednesday, June 30, 2010
Friday, June 18, 2010
full detail and paint correction on an Infiniti FX45
The owner of this vehicle was looking to sell it for something a bit smaller. After viewing the vehicle, we decided to go with an interior and exterior detail, along with removing minor scratches and swirls in the paint. I told her this would be a good option, since a professional detail can increase a car's resale value. I had the pleasure of having this vehicle in my possession for 3 days, so I was able to bring it back to life.
First up was the interior. Here is the compartment on the driver's side door. You don't see this area carpeted too much. Stains on carpet is a walk in the park.
Here is the driver's side door sill. It has its basic wear.
And of course the door jambs. All of them were loaded with dirt.
The driver's side floor has seen better days. Hey, a jellybean!
These areas can be hard to clean.
The middle console was covered in coffee stains.
The backseat was being robbed of its beauty. The back of the front seats were covered in scuff marks while the leather seats had stains all over them.
This is the door jamb in the back hatch. It had twigs, leaves, and a buildup of pollen.
I don't know what this was staining the rear floor mat but it was ugly!
The passenger's side wasn't too bad.
Don't forget up here! This is the opening of the sunroof. Please take notice of the outside paint here as well. I didn't take any before shots of the outside but this picture shows how dirty it was!
~~~AFTER SHOTS~~~
All the stains in the driver's side compartment were removed.
The driver's side door sill was cleaned up a bit.
Door jambs are shining again.
The driver's side floor area received a nice shampoo.
Every small crevice was cleaned.
Middle console cleaned and dressed.
Leather was conditioned, removing all the stains and bringing it back to a soft and supple feel.
The door jamb in the rear was all cleaned up.
The rear floor mat was cleaned and dressed.
The passenger's side floor all shampooed.
Sunroof cleared of all dirt.
Couple more finished interior shots...
Ready for some exterior shots? Here we go! The paint was treated with a two step polish, sealant, and wax.
So slick!
This one is my favorite. The owner should have no problem selling the car now!
Thanks for looking!
Wednesday, June 2, 2010
full detail on a Honda CRV
Sorry for not posting in a while. We've been real busy! I'd like to return with this Honda CRV. Yes, another black car. I think I'm cursed! Gemstone Detail currently has a Spring Special for our Ultimate Detail. This includes detailing the engine bay. Needless to say, a lot of customers are taking advantage.
The engine bay should be detailed at least a couple times a year. Grease builds up in here and dirt just loves to stick to grease. Too much buildup can clog tubes and hoses so keep an eye out. Here, you can see this engine bay hasn't been touched since the day it was bought (2 years ago.)
Before
After
Before
After
Before
After
Before
After
It's important to keep these areas free of any debris. These leaves and sticks could be robbing the engine of precious air. Yes, that is a pen!
All cleaned out
Wheels were in great shape. They just needed a decent wash.
Before
After
After the wheels, I gave the car a gentle wash then moved onto the door jambs.
Here is one of many reasons to keep your door jambs clean. Above that hinge is a spider's nest with eggs. I see these all the time.
Nest has been "relocated."
The leather just had some dirt buildup in it. Some conditioner would break that up nicely.
Before
After
These rubber mats do a great job taking care of the carpet underneath. Still, there was still some wear.
Before
After
The cup holders here told me I was in for some hard work. Somebody owns a dog!
Before
After
I keep forgetting to take pictures of the backseat for some reason. But ask the owner, I could of made a fur coat! Here is an after shot.
I picked up some new metal polish and it works awesome. Here I have the left side of the front grille treated, while the right side remains filled with oxidation and water spots.
A few more finished shots...
Thanks for looking!
Subscribe to:
Posts (Atom)